Showing posts with label Blogging. Show all posts

Make Google To Crawl Your Blog

Sitemaps, in simple English, are text files (see example) containing a list of all web pages that exist on your site. It is important that you create a comprehensive sitemap as it will help Google and other search engines crawl your site better and that might mean more traffic coming your way in the long run.

The Problem with Blogger Sitemap Files

Ideally, the sitemap file should contain all URLs of a site but if your blog is hosted on blogspot.com (or if you are using a self-hosted version of Blogger with a custom domain), you’ll be surprised to know that the default sitemap file (see example) contains only the 26 most recent pages of your blog.

That’s a bad thing because some of your older blog pages, that are missing from the system-generated sitemap file, may never get indexed in search engines. There’s however a simple solution to fix this problem.

Generate a Complete Sitemap for your Blogger Blog

Step 1: If you haven’t done this already, sign-in to your Google Webmasters account and add your blog. For details, check this video tutorial on how to add a blog to Google.

Step 2: Once your blog is added to Google, open the Sitemap Generator and type the full address of your blogspot blog (or your self-hosted Blogger blog).

submit sitemaps

Step 3: What you get is list of sitemap files that contain each and every page of your blog. You now just have to ping Google, Yahoo and Bing to inform them about these XML sitemaps.

As shown in the video screencast below, you need to manually add each of the sitemap files into your Google Webmaster Tools dashboard but for Bing or Yahoo, you can simply click blue hyperlinks and these search engines will automatically download the relevant sitemap files from your blogspot site.


Once all the Sitemaps are added, your Google Dashboard should look something like this.

sitemap added to google

If you see a red cross or an orange exclamation symbol instead of the green tick, that means something is wrong with your XML sitemap. Verify that the file exists by typing the sitemap URL in your browser.

Sometimes media enclosures (like MP3 files) in blog posts can create warnings during sitemap submission. And if you have switched from Blogger to WordPress, it still makes sense to submit sitemaps of your old Blogspot blog as that will only help search engines discover your new WordPress pages. Good luck.

Source : www.labnol.org

Google Adsense Account Banned? See here for how to get a Google Approved Adsense account with your name and address.. See this website for more details. http://googleadsenseaccount.wordpress.com/


If you enjoyed this post, make sure you subscribe to my  RSS Feeds !!

If you enjoyed this post, make sure you subscribe to my E-NewsLetter !!

Also follow me at twitter to know what I am doing.

Posted By: KirubaKaran

Microsoft Certified Technology Specialist

Get A Google Approved Adsense Account Using Tampering Plug In

This Short guide is for all those members who are in need for Adsense account.
This trick would not let you down. Now you will not have to get any more Rejection from Google.
How To Approve Google Adsense Account
google adsense signup
How To Approve Google Adsense Account
Here We Go...
1. Go To Adsense.com
2. Click on Signup
3. Now Fill all the coloumns and keep the country to pakistan ( later on you can changed )
4. In City Type '' Quetta "
5. In Postal Code Type 87300
6. Click On Submit.
All Done.. Now you will get a mail from Google Adsense which will confirm your resitration...
** Now How To Change The Country And Addsress..
1. Fill this form (Click Here) Adsense Support Bin (it will take 3 days to get updated)
Some TIPS:

If You Trying by this method you can just create a blog and apply for adsense.. u will be approved in 5mins..

Recently Google had aproving Pakistan Profiles Request For Adsense And There Is Problem In Changing Your Country
So Have Found Easy Method to change Your Country Just Fllow These Steps

1.You Need Tamper data Addon To Your Firefox
2.Now Restar Your FF & Login To Your Adsense Account With Your Pass &email
3.Now Click On Edit

submit form

4.And Goto Tools And Open Tamper Data And Start It

adsense-approve

5.Now Change Your,Address,City,Pin code & Click On Save Changes Tamper Data Will Poup Window Click ON Tamper

change country

Now Here you See In Second Field PK Is Written Now Change that is Pakistan Now Change It To IN & Click On OK & Stop Tamper Data
6.Now Choose Your State

google-adsense-approval

You Have Done You Will GEt Email From Google Saying Your Country Has Been Changed.

Hope Google is aware of It. Please Take necessary actions to stop these kind of fake accounts.

Google Adsense Account Banned? See here for how to get a Google Approved Adsense account with your name and address.. See this website for more details. http://googleadsenseaccount.wordpress.com/


If you enjoyed this post, make sure you subscribe to my  RSS Feeds !!

If you enjoyed this post, make sure you subscribe to my E-NewsLetter !!

Also follow me at twitter to know what I am doing.

Posted By: KirubaKaran

Microsoft Certified Technology Specialist

Block A Follower Of Your Blog

Some time ago, when the 'Follower' gadget was all new and exciting, I tried to cover a few aspects of using it - one of which was Blocking a Follower.

Things get changed, or updated, to make them better, or more streamlined. Thus was the case with Blocking a Follower. The result is the same, but the method slightly different.

To Block a Follower (for whatever reason) is as simple as:-

  • Go to your Dashboard
  • Click on 'Followers'
  • Click on the Image of the offending Follower
  • Click the option to Block
  • Block
  • Done
    ... see the following images -


    Simple ah .. !

If you enjoyed this post, make sure you subscribe to my  RSS Feeds !!

If you enjoyed this post, make sure you subscribe to my E-NewsLetter !!

Also follow me at twitter to know what I am doing.

Posted By: KirubaKaran
Microsoft Certified Technology Specialist

Google Adsense Account Banned? Get A New One Just For Rs.600

Google Account banned? No Problem.. You can get a new account with your name angoogle-adsensed address and most important thing is you need submit your blog and wait for approval.

How this Works?

I got this information from the Blog http://googleadsenseaccount.wordpress.com/ … They have the contact with the Google.. When you pay them the money of Rs.600.. They will get you a new adsense account..

To be frank i too have the account that i got in this way… So if you want a new adsense account.. send a mail to create.account.500@gmail.com and they will get you the details.. you can also leave a comment on this blog.


If you enjoyed this post, make sure you subscribe to my  RSS Feeds !!

If you enjoyed this post, make sure you subscribe to my E-NewsLetter !!

Also follow me at twitter to know what I am doing.

Posted By: KirubaKaran
Microsoft Certified Technology Specialist

Do you use Windows Live Writter? Try Bloggo

With Live Writer doing the things simple for Windows, Blogo does this for Mac. The first thing which you will notice after installing Blogo is its simple and attractive design.Blogo

The application makes posting text, images and multimedia content from the web easy for users with no knowledge of HTML.
Blogo’s strong points include a rich text editor with support for drag and drop of almost any image format and an HTML source view for manual adjustments, an automatically generated preview template which shows the user exactly how his post will appear when published, a fullscreen editing mode and support for comment moderation with the new WordPress comments API. Many more features.

Not only wordpress, it supports all types of blogging platforms. Blogger, Typepad, Typo, Drupal, Expression Engine, Twitter, Ping.fm and more

But the annoying feature is tat it is not free !!!!

Anyhow just download a 21 day trial from here [Source]


If you enjoyed this post, make sure you subscribe to my  RSS Feeds !!

If you enjoyed this post, make sure you subscribe to my E-NewsLetter !!

Also follow me at twitter to know what I am doing.

Posted By: KirubaKaran
Microsoft Certified Technology Specialist

Get Rid Of Image Size Limit In Blogger.com

If you are a regular reader of Blogger Tricks, you probably know that previously I had many problems hosting my template images. A year back, I used photobucket to host my template images.. but, the problem with photobucket and many other free image hosts is their bandwidth limitations. Once, you exceed a specific amount of bandwidth, your images won't show, instead.. an irritating ' bandwidth exceeded' image shows. Next, after that I tried to create.. like a new photobucket account per each template.. but, that also exceeded in a matter a couple of weeks.

Not only me, my other blogger template designers are also struggling to find a reliable, free image host with unmetered bandwidth.
I tried to upload the images to blogger and copy the image url from the status bar and use it in templates.. but it didn't worked. But, recently I came to know that we can actually host the images( large) in blogger and hotlink,use them in templates, forums,etc.
Here is the trick..
As usual, create a new post in blogger and upload your template images to that post... but don't publish it... keep it as a draft.
Once you completed uploading all the images, Open each image in a new window.
open image in new window
Once, the image is loaded in the new window, what I previously did was to copy the image location from the status bar and paste/hotlink it in templates. But, it didn't worked!
Copying image url from status bar
Now, the trick is, many people don't know that the url which we copy from the status bar is not exactly the direct link to that image file... that's why we can't hotlink to that image.
So, what we have to do to hotlink to that image is Right Click on the image and ' Copy Image location'. (for firefox users). For Internet explorer users, Right click on the image and go to Properties and then copy the image url from there.
right click and copy image location
Example:
For the above picture, status bar shows...

https://blogger.googleusercontent.com/img/b/R29vZ2xl/AVvXsEgBiuTFH85QM4bNsFiHIEuSuaznVqvDY0Q8ycwnXr6QIjORJZ035V6gdvLftxqQpH3N-OvVeEAGcdv1yo4x2Wm2hb03CBESV93_w3N7nAhDdYlHJm2ajcKdlcYbZhc4hRTu-RT4b2OmmUFD/s1600-h/2008-05-28_124414.jpg

which don't work.
And the Real image url we get after right clicking and copying image location is..

https://blogger.googleusercontent.com/img/b/R29vZ2xl/AVvXsEgBiuTFH85QM4bNsFiHIEuSuaznVqvDY0Q8ycwnXr6QIjORJZ035V6gdvLftxqQpH3N-OvVeEAGcdv1yo4x2Wm2hb03CBESV93_w3N7nAhDdYlHJm2ajcKdlcYbZhc4hRTu-RT4b2OmmUFD/s1600/2008-05-28_124414.jpg

Which works and we can do whatever we want.. with unlimited bandwidth :D
Hope this trick will be useful to many people who are searching for unlimited bandwidth image hosts.

Source : A Tip  © Blogger Tricks


If you enjoyed this post, make sure you subscribe to my  RSS Feeds !!

If you enjoyed this post, make sure you subscribe to my E-NewsLetter !!

Also follow me at twitter to know what I am doing.

Posted By: KirubaKaran
Microsoft Certified Technology Specialist

Attract Your Blog Visitors

Importance of Blog Design Blogs have increased popularity over this past months.  Many people have started to create their personal blogs to express their thoughts and feelings.  Internet companies have also started their blogs to inform consumers on the latest product news and reviews.

Many people spend time reading blogs.  People read their friend’s blogs, their favorite author’s blogs, blogs on topics that they are interested in, and blogs on product reviews.

Why Blog Design is Important ?

With the increasing popularity of blogging, it is even feared that people rely on blogs to get the latest news. When you have increased traffic on your blog, you should try to keep you visitors coming back and recommending your blog to friends and colleagues.

Here are a few tips to make your blog stand out from the millions of blogs out there that have standard designs.

Customize the Header Banner

Importance of Blog Design bannerThe banner usually has the most generic designs that are common to the blogs from a blogging company or service. You can personalize the banner by having a graphic with the dimensions of the banner. 

You can also edit the graphic so that it will also include the title of your blog.

Right : An Example from the Hills Blog

Personalizing photos

Importance of Blog Design photos Of course, most of the photos that you will be posting will be your own.  However, if you don’t customize the photos before posting them, you may miss maximizing the enhancing benefits graphics can add to the page.  Adding photo borders can help the photo stand out from the page. 

It can also add to the design of your blog.  You can choose a standard border or you can also create your own border which can be associated with your blog’s templates.

Add a favicon

Importance of Blog Design favicon Don’t you think sites with icons on the address bar before the website’s URL are cool?  Many people do.  These favicons add a professional look to the URL. 

There are sites that offer free blog templates, layouts, backgrounds, textures and skins and pre Embedded Favicons. You can make use of these so your blog will not look generic like most of the blogs.

Include RSS feeds

Importance of Blog Design rss This is a cool way to inform people with newsreaders about your blog headlines. 

Audio Podcasts & Videos makes your blog more personal. Not only does audio personalizes the blog; it can also keep your visitors coming back.  You can try having streaming video tutorials, mp3 file or playlists loading with your blog.

Advertisements

Importance of Blog Design ads If you have signed-up with Google AdSense, which I am sure you would like to do, make sure that the adsense ads are conveniently placed that these will not hinder your readers’ ease in accessing the information on your blog.

Try using these tips and you can definitely increase and retain traffic on your blog.

Source :www.snaphow.com


If you enjoyed this post, make sure you subscribe to my  RSS Feeds !!

If you enjoyed this post, make sure you subscribe to my E-NewsLetter !!

Also follow me at twitter to know what I am doing.

Posted By: KirubaKaran
Microsoft Certified Technology Specialist

Get The SEO Optimization Report Of Your Blog

SEO Optimization is very important for all websites to gain more earnings and visitors and web traffic, get a decent report of SEO optimization of your blog. Please do this, its a must for all blogger

My Blog is Ranked 79/100 in The SEO Optimization, Sound great right.

I just compared my blog with the popular www.labnol.org website, i know my blog is not match to this labnol, but i compared them just for testing purpose, here the results.

Kiruba SEO Report

Have to improve in various aspects, anyway lets get into this SEO Report.

WebsiteGrader Is a free online web tool which provides a to z Website analysis. You have to just fill out your blog URL with email address. And after Full analysis they will send you an Email providing full information about the blog which includes Search Engine optimization (SEO), Blog Optimization, On Page SEO, Off Page SEO And other Important Information.

A list of the Analysis Factors is given below:

1. On Page SEO

  • A. Heading Summary
  • B. Image Summary
  • C. Interior Page Analysis: 3 Pages Processed
  • D. Readability Level: Primary / Elementary School

II. Off-Page SEO

  • A. Domain Info
  • B. Google Page Rank: 0
  • C. Google Indexed Pages: 73
  • D. Last Google Crawl Date: December 20, 2008 @ 11:02 PM
  • E. Traffic Rank: Top 2.55 %
  • F. Inbound Links: 855
  • One of the most important measures for a website is how many other sites link to it. The more links the better. Having links to your website from authoritative resources on the Internet helps you rank higher in search engines since these links are an indication that your website is trustworthy and contains good content.
  • G. DMOZ Directory: Found DMOZ, The Open Directory Project, is the largest and most comprehensive human-edited directory of the Web. It is constructed and maintained by a vast, global community of volunteer editors.
  • H. Yahoo! Directory: Found BlogSpot is listed in the Yahoo! Directory.The Yahoo! Directory is a web directory which rivals the DMOZ Open Directory Project in size. We recommend that every business have a listing in the Yahoo! Directory.
  • I. Zoom Info: No Entry Found BlogSpot is not listed in the Zoom Info directory.Zoom Info is a business directory and search engine, with profiles on more than 37 million people and 3.5 million companies.

III. Blogosphere

  • A. Blog Ranking: Top 1.1 %
  • B. Recent Blog Articles

IV. Social Media sphere

  • A. del.icio.us bookmarks: 0
  • B. Digg.com Submission Summary

V. Converting Qualified Visitors to Leads

  • A. RSS Feed: Found
  • B. Conversion Form: Found

VI. Competitive Intelligence


Its Worth to give a try… !!

Web Link : http://website.grader.com/Default.aspx


If you enjoyed this post, make sure you subscribe to my  RSS Feeds !!

If you enjoyed this post, make sure you subscribe to my E-NewsLetter !!

Posted By: KirubaKaran
Microsoft Certified Technology Specialist

What Rank your Blog has? Check Them With Blog Ranking Widget

Have a blog.. want to mention your blog ranking in Google,Yahoo,Technorati.. Here is a noce widget for the ranking purpose, you can get all the three of the above mentioned ranks in a single web page.

Web Link : http://www.rankwidget.com/

Rank Widgets

You can get all the top four page rank of your blog in a singe website, after generating your blog rank you can display your blog rank as a cool widget, there are many more design patterns and they provide the widget code too. check them out..!!

Rank Widget Code

Web Link : http://www.rankwidget.com/


If you enjoyed this post, make sure you subscribe to my  RSS Feeds !!

If you enjoyed this post, make sure you subscribe to my E-NewsLetter !!

Posted By: KirubaKaran
Microsoft Certified Technology Specialist

How To Get Feedback From Your Blog Visitors

This is a must read post for all bloggers.

Today, if you have visited my blog, you would have notified a new widget at the Top-Left Corner..!! Its an simple widget, but a most important widget that is required for all bloggers. I recommend this for all blogs and website. This widgets attracts your visitors to give a feedback about your blog. I realize that feedback are too valuable for all bloggers.This feedback widget is called as Kampyle.

The Snapshot of the above widget is as shown:

en-orange-corner-up-rightOk.. Now lets move on. The another feature of this widgets is it cost nothing. This provides you a powerful on-demand solution to collect, analyze and manage your website visitors' feedback.

Okay now let me tell you how does this widget work.

When a visitor comes to your site, the scripts run in background and when they stay in your website for more than 30 sec(You can increase or decrease the time when you create the widget), it creates a assumption that the user got well binded with your blog, now he/she can give some feedback about your blog.

The Feed Back Form appears like this

FeedBack

If the users are not interested, simply they can give no, This is so important because it should not irritate your visitor. If the visitor is willing to give you feed back the script takes you to the next steps.

The Kapyle widget is so easy to create and install and one of the most important feature of this widget is you can place this widgets in the four corners of your blog and also as a link to provide feed back.

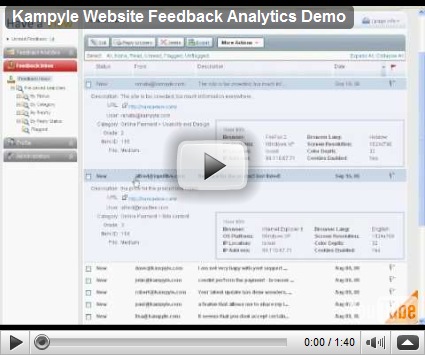
This widgets also provides you a Analytics: Check this video:

Don’t worry about SPAM feed back because when visitors give feed back, the kampyle uses the e-mail authentication for identifying the spam. So your get your valuable feedbacks for your blog.

Its worth to give a try.. !!

I request you to visit my blog and provide me feed back about my blog. Please provide me your valuable suggestions.


If you enjoyed this post, make sure you subscribe to my  RSS Feeds !!

If you enjoyed this post, make sure you subscribe to my E-NewsLetter !!

Posted By: KirubaKaran
Microsoft Certified Technology Specialist

How To Show Ads In Between The Blog Post To Earn More From Adsense

Just now learnt how to insert Google ads in between the blog post from the the devils workshop blog, Yes, showing Adsense Ads after each blog post was never simple like this! As this is one of the most awaited feature which Google integrated into Blogger! Also this means blogger won’t be needing our one of the most famous hack to Show ads after each post to earn more from your blogger beta blog!

Here is 3-step Guide to do it for your blogger blog…

  1. Log into your Blogger account at http://www.blogger.com .
  2. Visit your blog’s Template tab and click on the Page Elements link.

blog template

  • Click Edit in the Blog Posts section.
  • Check the box next to Show Ads Between Posts. You can then select how often you’d like your ads to appear, such as once after every post or once after every other post.
  • blog inline adsense

    1. Customize the ads and click on Save Changes when you’re done.

    Can it be made further simple??

    One thing I feel Google should provide is ability to choose where to insert ads! I mean before posts, after posts or after few lines/paragraphs!

    Ever more fine grain control can be given to blogger by giving ability to insert adsense codes any where between the posts! Say integrating some widget in post editor!


    If you enjoyed this post, make sure you subscribe to my  RSS Feeds !!

    If you enjoyed this post, make sure you subscribe to my E-NewsLetter !!

    Posted By: KirubaKaran
    Microsoft Certified Technology Specialist

    Google Mining Your Adsense Account

    google-thumb1

    If you have a blog or a website with a Google adsense account, please read this, it will be a much better instructions that may keep your adsense account with out getting banned.

    I am not sure whether the minnows like Bi-advertiser,Chitika or Ad-Brite are this much efficient. But Google does. Remember that you are playing with Google, which tracks down everything about your blog. Simply, Google is data mining your blog.

    google-adsenseStill thinking to cheat AdSense? Stop that. It will never bring you anywhere. You might pull it off with smaller ads network, but definitely not with Google. Here are some detection methods they might use. At the very least, they have the resources to do so.

    Cookies

    Most home users do not use static IP Address for Internet connection. In most cases just disconnect and reconnect will give you a new IP Address. But don't forget, Google has set cookies on your computer.

    Other Google Services

    Thinking that you are safe just because you do not access your AdSense account? Think again. This time, consider these: Gmail, Google Earth, Google Calendar, Google Search, Google Toolbar, Google Talk, Google Sitemap, Google Desktop, Blogger, and so on, and so on. With the wide range of services they provide, Google can trace the originator of most (or probably almost all) clicks.

    IP Address

    If the AdSense click is originated from the same IP Address as the one used for accessing your AdSense account, your account is flagged.

    Click Pattern 1

    Oh, why this computer / IP address / person is so trigger-click-happy on this particular website but never click on the ads on other sites?

    Click Pattern 2

    And why is it that people accessing these sites direct (type-in URL or from bookmark) tend to be very active ad-clickers compared with those referred from search engine or other sites?

    Click Pattern 3

    And why the ad-clickers like to hit and run, compared with non ad-clickers that surf a few pages before leaving?

    Click-Through-Rate (CTR)

    Your CTR may range from 0.5% to 10%, but if it exceeds a certain point (probably around 10%), you are flagged.

    Geo-Location

    Used Urchin (Google Analytics) before? Then you should know that Google can trace traffics origin down to the small town. Different IP doesn't mean much. Unless you site is really targeted to one small geo-point, a high number of clicks from nearby location will get you banned quickly.

    Webpage design

    How about the click here or support us? Google has the best search engine in the world. Is it really that hard to find those words?

    Advertisers conversion rate

    Ad click is one thing. But does it bring value to the advertisers? If none of the clicks on your site translate to conversion to the advertiser, you are in trouble. First the Smart-Pricing hits, then your AdSense account disabled.

    Hardware address?

    MAC address of the LAN card, modem, and router works almost like a fingerprint. I'm not sure if Google can track this, but probably they do. They have rocket scientist, remember?

    Combo

    Each of these detection methods might seem rather weak. But combine them together, and not many click-fraud can pass-through these filters. Even the smartest click bot will have a hard time.
    In short, it is almost impossible to cheat AdSense in the long term. Instead of spending time, money, and effort trying to outsmart Google, try these tips to improve your AdSense earning.[VIA]


    If you enjoyed this post, make sure you subscribe to my  RSS Feeds !!

    If you enjoyed this post, make sure you subscribe to my E-NewsLetter !!

    Posted By: KirubaKaran
    Microsoft Certified Technology Specialist

    Attractive Blogger Widgets

    Here is the top four widgets, that i see in many blogs and these widgets attracts your blog visitors very much, so that you can get much more page views.

    Sexy Social Bookmarking widget for Blogger

    It is the interesting blogger social bookmarking widget created by CssReflex.Like other social bookmarking widgets it consists of a different bookmarking icons of different sites.But it has got some features than older bookmarking widgets.It is sexy and in this widget the half part of images are hidden and when we hover the image the whole image is seen.this is the feature of this sexy bookmarking widget.Learn more

    Blog Sexy Bookmarking Widget

    Link within related posts widget with photo thumbnails

    It is the greatest related posts widget for blogger.The installation of this widget is really very easy.After you install the widget in your blog three related post will be automatically shown below each posts with photo thumbnails.Install it in your blog

    Blog Widgets

    Top Authors Widget For Blogger

    This widget is only for multiple author blogs.The top authors widget displays the list of top authors together with the number of posts each of them have made.This statistics is based on the latest 5000 posts on the blog.Learn more

    Most Viewed Post Widget for Blogger

    This widget shows the top 10 most viewed posts of your blog in the sidebar with the number of views made.learn more

    Hope that widgets are much useful for bloggers. [Via]

    If you enjoyed this post, make sure you subscribe to my  RSS Feeds !!

    If you enjoyed this post, make sure you subscribe to my E-NewsLetter !!

    Posted By: KirubaKaran
    Microsoft Certified Professional

    Drop Down Label Widget

    Our sidebars can become cluttered easily with information and widgets, particularly if we have a long list of labels (categories) . Many Blogger users like using drop-down lists for long lists which minimizes clutter and enables information to be displayed in the sidebar neatly.

    While Blogger offers a dropdown menu option for the Archives widget, we do not have the option to enable a dropdown list for our labels. So in this tutorial, I will explain a simple method you can use to adapt your regular Label list to become a drop-down list instead, offering a neat and concise solution which will minimize clutter in your Blogger sidebar.

    What we will achieve through this tutorial

    In this article, I’ll explain how to transform your Blogger label list from something which appears like this:

    Regular Labels List for Blogger

    To one which appears like this:

    screen-shot02-jun-01Dropdown list, expanded view

    This customization can be achieved in a few easy steps with minimal adjustments to your Blogger template code.

    How to create a dropdown menu for your labels

    Firstly, you should make a complete back up of your existing template. This ensures you can easily restore your current, working template in the event you make a mistake.

    To make a back up of your current template, go to Layout>Edit HTML in your Blogger dashboard and click the “Download Full Template” link near the top of the page. This will offer the option to save your current Blogger template as an XML file to your local computer. Be sure to save this file in a location you can easily find later.

    Once you have made a back up of your template, you can proceed to edit your labels list and create your dropdown menu.

    To proceed with this tutorial, you must ensure you have a “Labels” widget present in your Blogger template. If you do not have a Labels widget, o to Layout>Page Elements and add a Labels widget using the “Add a Gadget” link above your sidebar.

    Go to Layout>Edit HTML in your Blogger dashboard (if you are not already looking at this page) and ensure you have NOT checked the “Expand widget templates” box:

    unchecked-box

    Now using your browser’s search function, locate the following line in your Blogger template:

    <b:widget id='Label1' locked='False' title='Labels' type='Label'/>Highlight this complete line, And replace With the following code (copy To your clipboard And paste In place Of the line above):

    <b:widget id='Label1' locked='False' title='Labels' type='Label'>
    <b:includable id='main'>
    <b:If cond='data:title'>
       <h2><data:title/></h2>
    </b:If>
    <div Class='widget-content'>

    <br />
    <Select onchange='location=this.options[this.selectedIndex].value;'>
       <Option>Select a label</Option>
       <b:Loop values='data:labels' var='label'>
          <Option expr:value='data:label.url'><data:label.name/>
             (<data:label.count/>)
          </Option>
       </b:Loop>
    </Select>

       <b:include name='quickedit'/>
    </div>
    </b:includable>
    </b:widget>

    Now preview the changes you have made to your template. In place of the long, reular list of labels you should now see a neat drop down menu. If all looks well, you can proceed to save your adjustments to your Blogger template.

    Making adjustments to your dropdown menu

    Once you have created your dropdown menu for your labels, you will be able to move this widget to a different location in your template through the Layout>Page Elements section of your Blogger dashboard. You can also edit the properties of this widget to change the order in which labels are displayed by clicking on the “Edit” link for the Labels widget:

    screen-shot05-jun-01

    Here you can choose between displaying your labels in alphabetical order, or by their frequency (with the label linked to the highest number of posts first).

    You can also choose to remove this widget altogether from your layout. However, if you remove this widget and create a new Labels widget, you will need to customize this again (using the steps outlined above) if you wish to create another drop down menu.

    To alter the phrase “Choose a label to view” which is visible when the drop down menu is contracted, you will need to go to the Layout>Edit HTML page of your Blogger dashboard and check the “Expand widget templates” box. Then search for this phrase in your template code.

    Simply alter the wording of this phrase to something more suitable for your blog, being careful not to alter any of the surrounding code.

    To clarify, here is the line of code where adjustments will be made. The text which can be altered is highlighted in red:

    <Select onchange='location=this.options[this.selectedIndex].value;'>
    <Option>Choose a Label To View</Option>
    <b:Loop values='data:labels' var='label'>
     
     
    Final thoughts

    I hope you have found this Blogger tutorial useful and that this explanation will enable you to convert your regular Labels list into a dropdown menu with ease.

    Source : Blogging Tips

    If you enjoyed this post, make sure you subscribe to my  RSS Feeds !!

    If you enjoyed this post, make sure you subscribe to my E-NewsLetter !!

    Posted By: KirubaKaran
    Microsoft Certified Professional

    Please feel free to leave your comments and suggestions below.

    Recent Post Blogger Widget

    This post explains how to add Recent Posts widget in Blogger with image thumbnails:

    This is the Snap Shot in my blog:

    Recent Post

    Features:
    Thumbails to Recent Posts
    Comment Count


    So, let's see how to install this cool widget in your blog..
    1. Sign into Blogger dashboard
    2. Go to Layout » Add a gadget » html/javascript
    3. Just copy and paste this code..


    <script language="JavaScript">

    imgr = New Array();


    imgr[0] = "http://i43.tinypic.com/orpg0m.jpg";

    imgr[1] = "http://i43.tinypic.com/orpg0m.jpg";

    imgr[2] = "http://i43.tinypic.com/orpg0m.jpg";

    imgr[3] = "http://i43.tinypic.com/orpg0m.jpg";

    imgr[4] = "http://i43.tinypic.com/orpg0m.jpg";
    showRandomImg = True;

    boxwidth = 298;

    cellspacing = 8;

    borderColor = "#ffffff";

    bgTD = "#000000";

    thumbwidth = 40;

    thumbheight = 40;

    fntsize = 12;

    acolor = "#666";

    aBold = True;

    icon = " ";

    text = "comments";

    showPostDate = False;

    summaryPost = 40;

    summaryFontsize = 10;

    summaryColor = "#666";

    icon2 = " ";

    numposts = 5;

    home_page = "http://kiruba-for-you.blogspot.com/";

    </script>

    <script src="http://myblogtalk.com/bloggertemplates/js/recentposts_thumbnail.js" type="text/javascript"></script>


    Explanation:


    (Edit the values to fit your blog)
    boxwidth - Width of the widget
    cellspacing - Space between cells (default one is good)
    borderColor - Border color (add the background color of your template to perfectly blend it in the template)
    thumbwidth & thumbheight - Width and Height of the thumbnail (default are good)
    fntsize - Font size of the title
    acolor - Color of the title
    aBold - you want bold titles? (true or false)
    numposts - How many posts you want to show?
    home_page : http://kiruba-for-you.blogspot.com/ (change this to your blog url)

    4. Last but not the least.. Save the Changes.


    That's it guys!

    If you enjoyed this post, make sure you subscribe to my  RSS Feeds !!

    If you enjoyed this post, make sure you subscribe to my E-NewsLetter !!

    Posted By: KirubaKaran
    Microsoft Certified Professional

    Make Your Post To Speak

    Want to convert your written speech into Mp3 format for educational purpose or want to add a widget into your blog post footer that your visitor can read and hear your articles. Then Vozme is here to help you. Vozme is a free online text to Mp3 converter and provides a free widget that can be installed easily into your blogs whether it is a blogger or word press blog. Visit site to convert your articles into mp3 and download converted file to your computer hard drive. There is two options to get your text converted one are into female voice and other is Male voice.

    How to add Text to Mp3 converter into your blog template


    For Wordpress Users


    Download wordpress Plugin from this link http://vozme.com/wordpress_plugin/vozme.zip. This is a zip file so extract this compressed file and upload folder vozme to /wp-content/plugins/. Get into Wordpress administration tool > Plugins and click the "Activate" link within the vozMe plug-in. Access "Options > vozMe" and select your favorite options.

    For BlogSpot Users


    Login your blogger account. Click on layout followed by Edit HTML. Take full backup of your blogger template. Then check "Expand Widget Templates" option. Find the line: <div class='post-footer'>. Before this line, insert the below code and save your template.

    <div id='voice'>
    <script src='http://vozme.com/Get_text.js' type='text/javascript'/> <a expr:onclick='"Get_blogger(\"" + data:post.id + "\",\"en\",\"ml\");"' href='javascript:void(0);'><img src='http://vozme.com/img/paper_sound32x32.gif' align='left' alt='' border='0' style='margin-right:0.4em;'/></a>
    <a expr:onclick='"Get_blogger(\"" + data:post.id + "\",\"en\",\"ml\");"' href='javascript:void(0);' style='font-size:10px;'>Hear<br/>this post</a>
    </div>


    I just tested the script with My Test Scripting Blog, and it works perfectly. After you added the script, you will find. and image like this below your post.

    Speech image

    When you a user clicks on that, he can listen to your post.

    Speech To Your Post

    You can even download them as the Mp3 Files.

    That’s cool right.. !!

    Its worth to give a try. Please make a back up of your template before doing this.

    Now we are ready with our installed widget to provide our visitors reading and listening power.

    If you enjoyed this post, make sure you subscribe to my  RSS Feeds !!

    If you enjoyed this post, make sure you subscribe to my E-NewsLetter !!

    Posted By: KirubaKaran
    Microsoft Certified Professional

    Choose Your Favorate Button Packages

    Some of the best things in life are free. When it comes to icons and icon sets, there are many talented designers and artists that choose to provide beautiful and useful icon sets for commercial and/or personal usage.


    In this collection, you’ll see 60 beautiful, stylish, cool, trendy, free icon sets that you can use in a variety of ways in your website / blog or applications. All of the below listed icons packages are free. Feel free to visit these packages and download them to use in your projects. Over the past several months many other blogs have compiled their list of website, social media, Twitter and other icons, so in case you missed them here is the another collection!


    Note: It’s important to read the fine-print before using any icon sets; some may have restrictions for commercial use (or require that you give credit to the designer).


    RSS Feed Icon


    Cute Critters Icon Pack


    Made Of Wood Icons


    Coquette Part

    Easter Icon Set

    Futuristica Icons

    Grace Icons

    Grungy Aexthetica Icons

    Web Injection

    Valentines Icons

    Couquette Part 3

    Distortion Icons Set

    Distortion Icons Set

    Merry Christmas Icons

    Socialize Icons Set

    Nurture Icons Set

    Aesthetica Icons Set

    Balloonica Icons

    Blossom Icon Set

    Bevel Dark Social Icons

    Classy Icon Set

    Stickers Icon Set

    Grungy Asphalt

    Heart V2 : Social Bookmark Icons

    Grungy Olive

    Ruby Extended

    Simplistica Icons


    Bevel Lite Social Icons

    Sketchy Paper Icons

    Valentine Love Icons


    Blue Velvet


    Web 2.0 Rigami

    Ruby Multimedia Icons Set


    WYSIWYG Classic Icons


    WYSIWYG Sapphire Icons


    NX10 Icons Set


    iPhone Style Icons Set

    Web Social Icons

    Two Tone Icons

    Neon Agua iPhone Theme Icons

    3D Cartoon Icons Pack

    Icons For Bloggers

    Doodle Icons

    Handycons 2 Icons

    Circle Social Bookmark Icons

    Arrow Icons

    Drink Web 2.0

    Web 2.0 User

    Feed Icons

    Web Stock Icons

    Vidro Icon Pack in Six Colors

    Free Vector Social Bookmark Icons

    Slapyfish Icons Set

    handycons - Hand Drawn Icons

    I Like Buttons

    Fugue Icons Set

    Enjoy!!!

    Choose your favorate.. !!

    If you enjoyed this post, make sure you subscribe to my  RSS Feeds !!

    If you enjoyed this post, make sure you subscribe to my E-NewsLetter !!

    Posted By: KirubaKaran
    Microsoft Certified Professional